
Unlock the Secrets of Hardwood Refinishing: Tips, Tricks, and Techniques
Are your hardwood floors looking dull and worn out? Don’t worry, because we have the solution for you! In this article, we will unlock the secrets of hardwood refinishing, providing you with essential tips, tricks, and techniques to restore the natural beauty of your floors. Whether you’re a DIY enthusiast or a professional contractor, these expert insights will help you achieve stunning results.
From choosing the right sandpaper grit to the best stains and finishes to use, we’ve got you covered. We’ll guide you through every step of the refinishing process, so you can confidently transform your floors into a visual centerpiece for your home or office.
Discover the dos and don’ts of hardwood refinishing, learn how to properly prepare your floors, and get insider tips on achieving a flawless finish. With our comprehensive guide, you’ll gain the knowledge and skills to revitalize your hardwood floors with ease. Hardwood Refinishing estimate
Say goodbye to expensive floor replacements and hello to beautifully refinished hardwood floors. Unlock the secrets of hardwood refinishing today and transform your space into something truly remarkable, Hardwood Refinishing

Why refinish hardwood floors?
Hardwood floors are a timeless and elegant addition to any space, but over time, they can become worn, scratched, or discolored. Refinishing your hardwood floors not only restores their beauty but also extends their lifespan. It’s a cost-effective alternative to replacing the entire flooring and allows you to customize the look to suit your style. Refinishing also gives you the opportunity to fix any imperfections, such as deep scratches or stains, and protect the wood from further damage. Unlock the Secrets of Hardwood Refinishing, Free estimate here
Assessing the condition of your hardwood floors
Before diving into the refinishing process, it’s crucial to assess the condition of your hardwood floors. Inspect the surface for scratches, dents, or areas with excessive wear. Determine if there are any deep stains that might require extra attention. Assessing the condition will help you plan the necessary steps and choose the appropriate products for your specific needs. Hardwood Refinishing
It’s essential to consider the thickness of the hardwood before refinishing. If the floors have been previously refinished multiple times, they might not have enough wood left for another sanding. In such cases, it might be more suitable to opt for alternatives like recoating or covering the floors with engineered wood.
Preparing your hardwood floors for refinishing
Proper preparation is the key to achieving a flawless finish. Start by removing all furniture and rugs from the room. Clearing the space will give you unrestricted access to the floors and prevent any accidental damage. Next, thoroughly clean the entire area, removing any dirt, dust, or debris. A vacuum cleaner or a soft-bristle broom is ideal for this task. If there are sticky residues or hardened spills, you can use a wood-safe cleaner or a damp cloth to gently scrub the affected areas. Hardwood Refinishing
Once the floors are clean, it’s time to address any imperfections. Fill in any deep scratches or gaps with wood filler, ensuring a smooth and even surface. Sanding the floors is the next step in the preparation process. This removes the existing finish, evens out the surface, and allows the new finish to adhere properly. Start with a coarse-grit sandpaper to remove the old finish, and gradually work your way to finer grits for a smoother finish.
Choosing the right products and tools for refinishing
Choosing the right products and tools is essential for achieving professional results. When it comes to sandpaper, the grit you choose depends on the condition of your floors. Coarse grits, such as 36 or 40, are suitable for removing the old finish and leveling the surface. Medium grits, like 60 or 80, are ideal for smoothing out imperfections and preparing the floors for the final sanding. Fine grits, such as 100 or 120, are used for the final sanding to achieve a smooth and polished surface.
In terms of stains and finishes, there are numerous options available on the market. Oil-based stains are popular for their rich and deep colors, while water-based stains offer a wider range of colors and faster drying times. It’s essential to choose a stain that complements the overall aesthetic of your space. When it comes to finishes, polyurethane is a popular choice for its durability and resistance to scratches and stains. However, there are also other options like oil-based finishes and wax that provide a more natural and matte look.
Step-by-step guide to refinishing hardwood floors
Now that you have prepared the floors and chosen the right products, it’s time to start the refinishing process. Here’s a step-by-step guide to help you achieve professional results:
1. Sanding: Start by sanding the floors with a coarse-grit sandpaper, working in the direction of the wood grain. Make sure to sand evenly and avoid applying too much pressure, as it can cause unevenness. Repeat the process with medium and fine-grit sandpapers until you achieve a smooth surface.
2. Staining: If you choose to stain your floors, apply the stain using a brush or a rag, following the manufacturer’s instructions. Make sure to work in small sections and wipe off any excess stain to avoid blotching. Allow the stain to dry completely before moving on to the next step.
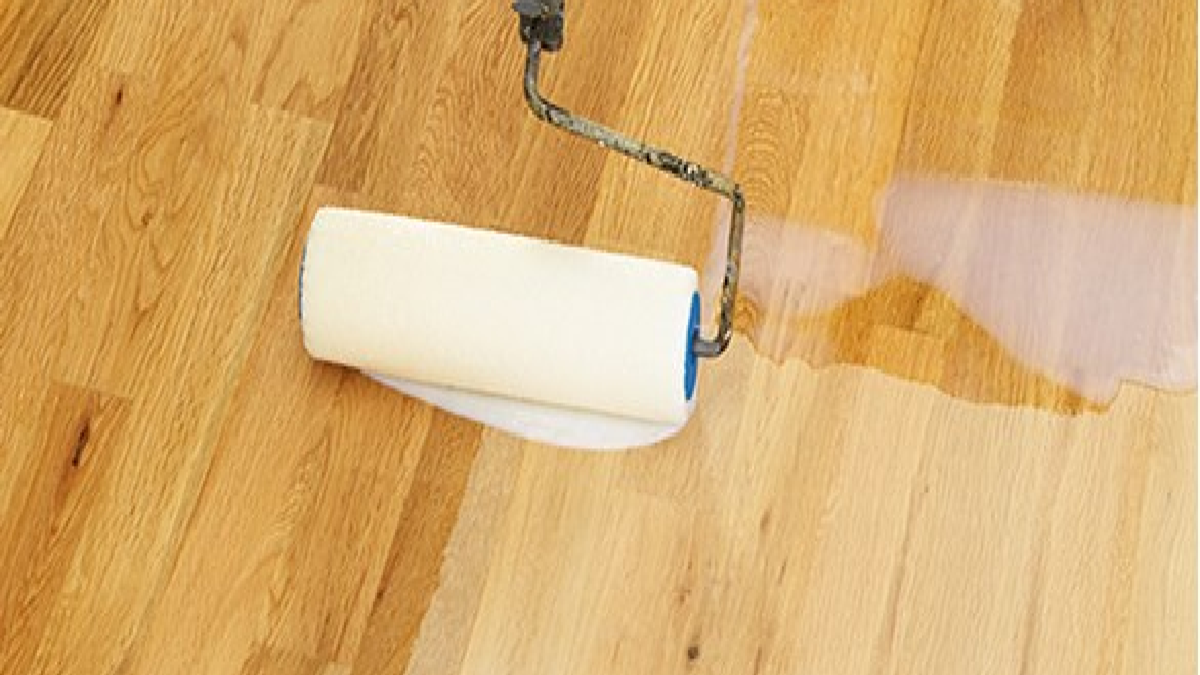
3. Applying the finish: Once the stain has dried, it’s time to apply the finish. Use a high-quality brush or a lambswool applicator to evenly spread the finish in the direction of the wood grain. Apply multiple thin coats, allowing each coat to dry completely before applying the next. Sand lightly between coats to create a smooth surface.
4. Final touches: After applying the final coat of finish, allow it to dry for at least 24 hours before walking on the floors or placing furniture back in the room. Once the floors are fully cured, you can add rugs and furniture to complete the transformation. Hardwood Refinishing
Tips and tricks for achieving a professional finish, Hardwood Refinishing
Achieving a professional finish requires attention to detail and some insider tips. Here are a few tricks that can help you elevate your refinishing game:
1. Test the stain: Before applying the stain to the entire floor, it’s essential to test it on a small, inconspicuous area. This will allow you to see how the color looks on your specific wood species and adjust if needed. Hardwood Refinishing
2. Use a tack cloth: After sanding, use a tack cloth to remove any dust or debris from the surface. This ensures that the Hardwood Refinishing adheres properly and prevents any imperfections.
3. Apply thin coats: When applying the finish, it’s better to apply multiple thin coats rather than one thick coat. Thin coats dry faster and are less likely to result in streaks or bubbles.
4. Sand between coats: Sanding lightly between coats helps create a smooth surface and promotes better adhesion of subsequent coats. Use a fine-grit sandpaper or a sanding sponge for this step.
Common mistakes to avoid during Hardwood Refinishing
While refinishing hardwood floors can be a rewarding process, there are some common mistakes that you should avoid: Hardwood Refinishing
1. Skipping the preparation: Proper preparation is crucial for achieving a professional finish. Skipping steps like cleaning, filling gaps, or sanding can result in a subpar outcome.
2. Rushing the drying process: Each coat of finish needs ample time to dry before applying the next. Rushing this process can lead to a sticky or uneven finish.
3. Overfilling gaps: When filling gaps with wood filler, make sure not to overfill. Excessive filler can cause the wood to crack or create an uneven surface.
4. Applying too much pressure: When sanding or applying the finish, avoid applying too much pressure. This can result in uneven surfaces or streaks.
Maintenance and care after Hardwood Refinishing
After refinishing your hardwood floors, it’s important to take proper care to maintain their beauty and extend their lifespan. Here are some tips for maintenance and care:
1. Regular cleaning: Regularly sweep or vacuum the floors to remove dirt and debris. Avoid using harsh chemicals or abrasive cleaners that can damage the finish.
2. Use protective pads: Place protective pads under furniture legs to prevent scratches and dents. Avoid dragging heavy furniture across the floors.
3. Wipe spills immediately: If any spills occur, wipe them immediately to prevent stains or damage to the finish. Use a slightly damp cloth or a recommended wood-safe cleaner.
4. Refinish when necessary: Over time, the finish might wear off or become scratched. When this happens, it’s time to refinish the floors again to restore their beauty and protect the wood floors.
Conclusion: Transforming your hardwood floors
Refinishing your hardwood floors is a rewarding process that can completely transform the look and feel of your space. By following the tips, tricks, and techniques provided in this article, you can confidently tackle the refinishing process and achieve stunning results. Remember to assess the condition of your floors, properly prepare them, choose the right products and tools, and follow a step-by-step guide for refinishing. Avoid common mistakes and take proper care of your newly refinished floors to maintain their beauty for years to come. Unlock the secrets of hardwood refinishing today and give your space a remarkable makeover. Hardwood Refinishing
Assessing the condition of your hardwood floors: Unlock the Secrets of Hardwood Refinishing
Hardwood floors are a timeless and elegant addition to any home or office space. Over time, however, they can become scratched, faded, or damaged, losing their original luster. That’s where hardwood refinishing comes in. Refinishing your hardwood floors not only restores their beauty but also extends their lifespan, saving you the cost of replacing them entirely.
Refinishing allows you to remove surface imperfections, repair minor damage, and apply a fresh coat of finish, giving your floors a brand-new look. Additionally, refinishing can help protect your floors from future wear and tear, ensuring they stay in top condition for years to come.
Preparing your hardwood floors for refinishing
Before diving into the refinishing process, it’s important to assess the condition of your hardwood floors. This will help you determine the level of work required and the best approach to take. Start by inspecting the floors for scratches, stains, or any areas that have lost their finish. Take note of any deep gouges or structural issues that may need professional attention.
Next, evaluate the overall thickness of your hardwood floors. Solid hardwood floors can typically be refinished multiple times, as they have a thick wear layer. Engineered hardwood floors, on the other hand, have a thinner wear layer and may only be refinished once or twice. Understanding the condition and thickness of your floors will help you set realistic expectations and plan your refinishing project accordingly.
Choosing the right products and tools for refinishing
Proper preparation is crucial to achieve a successful refinishing project. Start by clearing the room of all furniture and rugs, allowing you ample space to work. Next, thoroughly clean the floors to remove any dirt, dust, or debris. Use a broom and vacuum to ensure the surface is free from any loose particles that may interfere with the refinishing process.
After cleaning, it’s time to address any repairs or replacements needed. Fill in any cracks or gaps with wood filler and sand down any uneven areas. If there are damaged boards beyond repair, consider replacing them before proceeding with refinishing. Taking the time to prepare your floors properly will ensure a smooth and even finish.
Step-by-step guide to refinishing hardwood floors
To achieve professional-looking results, it’s essential to choose the right products and tools for your hardwood refinishing project. Start by selecting the appropriate sandpaper grit for the initial sanding. Coarse grits, such as 36 or 60, are ideal for removing old finish and deep scratches, while finer grits, such as 120 or 150, are used for smoothing and preparing the surface. Hardwood Refinishing
When it comes to stains and finishes, there are various options to consider. Oil-based stains provide rich, deep colors and enhance the natural beauty of the wood, while water-based stains offer a wider range of color choices and dry quickly. Choose a stain that complements your space and personal style. For the finish, opt for a durable polyurethane or varnish that provides long-lasting protection against daily wear and tear.
In terms of tools, you’ll need a drum sander or orbital sander for the sanding process. Additionally, a detail sander or sanding block will come in handy for hard-to-reach areas. A vacuum or shop vac is essential for dust removal, ensuring a clean working environment. Don’t forget to wear protective gear, including goggles, a dust mask, and gloves, to safeguard yourself during the refinishing process. Hardwood Refinishing
Common mistakes to avoid during hardwood refinishing
To achieve a professional finish and avoid common pitfalls, keep the following tips and tricks in mind throughout the hardwood refinishing process:
1. Take your time: Rushing through the refinishing process can lead to mistakes and subpar results. Take the time to properly sand, clean, and apply each coat of finish, ensuring a flawless finish. Hardwood Refinishing
2. Test the stain: Before applying the stain to your entire floor, test it on a small, inconspicuous area to ensure you achieve the desired color and finish.
3. Work in small sections: Refinishing your floors in small, manageable sections will help you maintain control and achieve consistent results. Avoid working on too large an area at once.
4. Check for bubbles and drips: Keep an eye out for bubbles or drips in the finish as you apply each coat. Smooth them out immediately to avoid unevenness.
5. Follow the manufacturer’s instructions: Each product may have specific instructions for application, drying times, and recoating. Be sure to read and follow these instructions for the best results.
6. Allow for proper drying time: Patience is key when it comes to drying time. Allow each coat of finish to dry fully before sanding or applying the next coat. Rushing this step can lead to a compromised finish.
Maintenance and care after refinishing
While refinishing your hardwood floors can be a rewarding project, it’s important to avoid common mistakes that can compromise the results. Here are some mistakes to watch out for: Hardwood Refinishing
1. Skipping the preparation: Neglecting proper floor preparation, including cleaning, repairs, and sanding, can result in an uneven or unsatisfactory finish.
2. Using the wrong grit: Using the wrong sandpaper grit can lead to a poor sanding job or excessive removal of the wood surface. It’s important to choose the appropriate grit for each stage of the refinishing process.
3. Applying too much stain: Applying an excessive amount of stain can result in blotchy or uneven coloration. Always follow the manufacturer’s instructions and apply the stain sparingly.
4. Not sanding between coats: Failing to sand between coats can result in a rough or uneven finish. Take the time to lightly sand the surface before applying additional coats of finish.
5. Applying too many coats: While multiple coats of finish are necessary to achieve optimal protection, applying too many coats can result in a thick, unnatural-looking finish. Follow the manufacturer’s recommendations for the appropriate number of coats.
Conclusion: Transforming your hardwood floors
Once you have successfully refinished your hardwood floors, it’s important to implement proper maintenance and care to ensure their longevity and beauty. Here are some tips to keep your newly refinished floors looking their best: Hardwood Refinishing
1. Regular cleaning: Sweep or vacuum your floors regularly to remove dirt, dust, and debris. Avoid using abrasive cleaners or excessive water, as they can damage the finish.
2. Protective measures: Place doormats at entryways to trap dirt and prevent it from scratching the floors. Use felt pads under furniture legs to avoid scratches and dents caused by movement.
3. Avoid high heels and pet claws: High heels and pet claws can easily scratch and damage refinished hardwood floors. Encourage family members and guests to remove high heels when indoors and keep pet claws trimmed.
4. Minimize direct sunlight: Over time, direct sunlight can fade and discolor hardwood floors. Use blinds or curtains to minimize exposure to harsh sunlight, especially during peak hours.
5. Regular maintenance coats: Depending on the level of foot traffic, consider applying maintenance coats of finish every few years to keep your floors looking fresh and protected. Follow the manufacturer’s recommendations for application and drying times.